A WhatsApp webhook is the URL where Meta sends everything that happens on your number: messages customers send you, and the sent, delivered, read and failed status of messages you send. Without one, the Cloud API can send messages but you never see the replies.
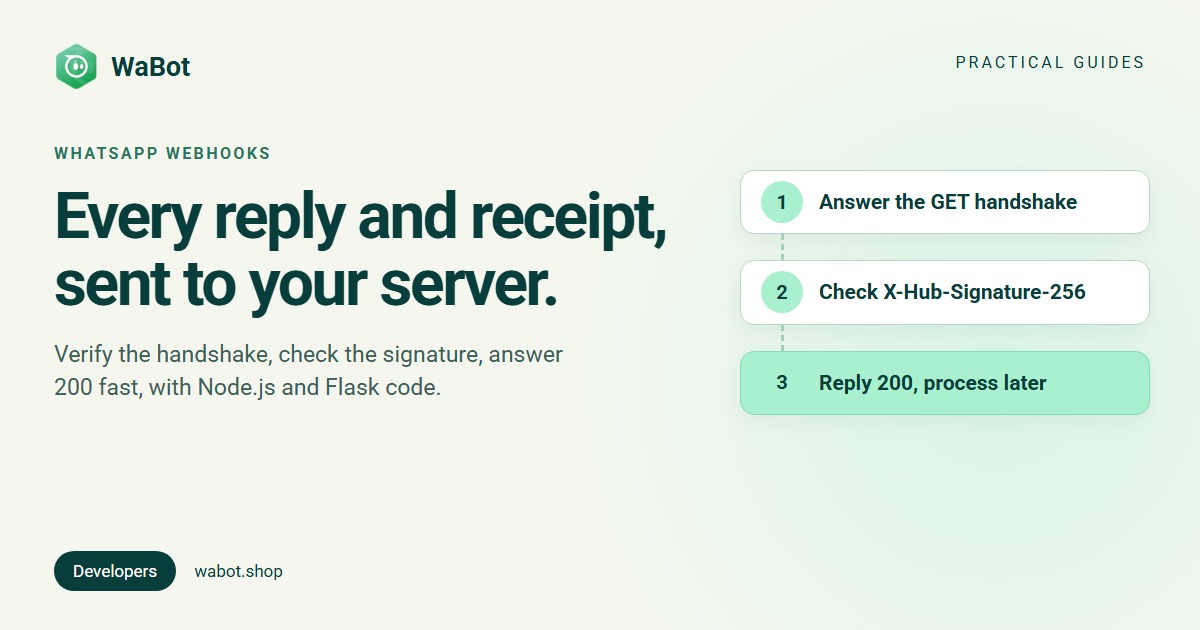
Setting it up takes three things: answer Meta’s verification request, subscribe to the messages field, and handle the POSTs safely (check the signature, answer 200 fast, expect duplicates). Here’s each step with Node.js and Python code, and how Wabot passes the same events on to your systems.
How WhatsApp webhooks work
Meta calls your endpoint in two ways: a GET when you save the URL, to verify it, and a POST with a JSON body for every event in the fields you subscribe to (Meta: WhatsApp webhooks). The endpoint must be public and use HTTPS with a valid certificate; self-signed certificates aren’t accepted. Your app also needs the whatsapp_business_messaging permission for the messages webhook.
| Field | What it tells you |
|---|---|
messages | Incoming messages, and the status of messages you send |
message_template_status_update | A template was approved, rejected, paused or otherwise changed status |
message_template_quality_update | A template’s quality score changed |
account_alerts | Changes to your messaging limit, business profile or Official Business Account status |
Most integrations start with messages alone.
Step 1: answer the verification request
When you save or edit the Callback URL or Verify token in the App Dashboard, Meta sends a GET to your URL with three query parameters: hub.mode=subscribe, hub.challenge (a random value) and hub.verify_token (the string you chose). If the verify token matches the one stored on your server, respond with status 200 and the hub.challenge value as the plain body. Otherwise respond with a 4xx status (Meta: create a webhook endpoint).
Only then does Meta treat the endpoint as verified and start sending events. The verify token is just a string you make up; it isn’t your access token or app secret.
Step 2: add the URL and subscribe to messages
- Deploy the endpoint below so it answers on a public HTTPS URL.
- In the App Dashboard, open WhatsApp → Configuration (or Use cases → Customize → Configuration if you created the app with the “Connect with customers through WhatsApp” use case).
- Enter the Callback URL and Verify token and save. Meta runs the GET check.
- In the list of fields that appears, subscribe to
messages. - Send a test payload from the same panel, then message your number from your phone.
Meta notes that some webhooks aren’t sent while the app is in Dev mode, so switch it to Live before you rely on them.
What arrives: message and status payloads
Every POST has the same envelope: entry, then changes, each with a field and a value. An incoming message has a messages array (Meta: messages webhook):
{
  "object": "whatsapp_business_account",
  "entry": [{
    "id": "102290129340398",
    "changes": [{
      "field": "messages",
      "value": {
        "messaging_product": "whatsapp",
        "metadata": { "display_phone_number": "15550783881", "phone_number_id": "106540352242922" },
        "contacts": [{ "profile": { "name": "Maya" }, "wa_id": "15551234567", "user_id": "US.13491208655302741918" }],
        "messages": [{
          "from": "15551234567",
          "from_user_id": "US.13491208655302741918",
          "id": "wamid.HBgLMTY1MDM4Nzk0MzkVAgASGBQzQTRBNjU5OUFFRTAzODEwMTQ0RgA=",
          "timestamp": "1749416383",
          "type": "text",
          "text": { "body": "Does it come in another color?" }
        }]
      }
    }]
  }]
}
A status update has a statuses array instead. Its id is the wamid you got back when you sent the message, and pricing shows the category Meta charged (Meta: status webhooks):
{
  "object": "whatsapp_business_account",
  "entry": [{
    "id": "102290129340398",
    "changes": [{
      "field": "messages",
      "value": {
        "messaging_product": "whatsapp",
        "metadata": { "display_phone_number": "15550783881", "phone_number_id": "106540352242922" },
        "statuses": [{
          "id": "wamid.HBgLMTY1MDM4Nzk0MzkVAgASGBQzQUFERjg0NDEzNDdFODU3MUMxMAA=",
          "status": "delivered",
          "timestamp": "1750030073",
          "recipient_id": "15551234567",
          "pricing": { "billable": true, "pricing_model": "PMP", "type": "regular", "category": "utility" }
        }]
      }
    }]
  }]
}- Loop over everything. Meta can batch up to 1,000 updates in one POST, though not always, so walk every
entry,changeand array item. - Statuses are
sent,delivered,read,failedandplayed(voice messages). A message read the moment it arrives can skipdelivered. Failed statuses carry anerrorsarray with the code, such as 131049 (what it means). - Identify people by
user_id, the business-scoped user ID Meta now includes. If a user has adopted a username,wa_idandfrommay be missing. - Payloads can be up to 3 MB, and there’s no API to fetch past webhooks, so store what you need when it arrives.
Verify X-Hub-Signature-256
Anyone can POST to a public URL, so check that each request came from Meta. Every POST carries a header X-Hub-Signature-256: sha256=<hash>. Compute an HMAC-SHA256 of the request body with your app secret (from your app’s basic settings in the App Dashboard) as the key, and compare it with everything after sha256=. If they don’t match, reject the request with a 4xx.
Two details that break most first attempts: hash the raw bytes exactly as received, not JSON you parsed and re-serialised, and compare in constant time. The app secret signs webhooks; your access token isn’t involved.
Answer 200 fast, and expect repeats
Meta’s rule is simple: respond with 200 to a valid request. If your endpoint answers with anything else, or can’t be reached, Meta tries again with decreasing frequency for up to 7 days, and those repeat deliveries can arrive as duplicates (Meta: create a webhook endpoint).
- Acknowledge first, work later. Verify the signature, put the payload on a queue, return 200. Calling your CRM or sending a reply inside the request makes slow responses and repeats more likely.
- Make handlers idempotent. Key messages on their
idand statuses onidplusstatus, and skip what you’ve already processed. - Don’t depend on order. Store the latest status by timestamp rather than assuming sent, delivered and read arrive in sequence.
A complete handler in Node.js (Express)
Both handlers read VERIFY_TOKEN and APP_SECRET from environment variables, answer the handshake, check the signature on the raw body, return 200 and then process.
// npm install express   (Node.js 18+, saved as webhook.mjs)
import crypto from "node:crypto";
import express from "express";

const app = express();
const { VERIFY_TOKEN, APP_SECRET } = process.env;

// 1. Verification handshake
app.get("/webhook", (req, res) => {
  if (req.query["hub.mode"] === "subscribe" && req.query["hub.verify_token"] === VERIFY_TOKEN) {
    return res.status(200).send(req.query["hub.challenge"]);
  }
  res.sendStatus(403);
});

// 2. Events: keep the raw body, the signature is computed over it
app.post("/webhook", express.raw({ type: "application/json" }), (req, res) => {
  const expected = Buffer.from("sha256=" + crypto.createHmac("sha256", APP_SECRET).update(req.body).digest("hex"));
  const received = Buffer.from(req.get("X-Hub-Signature-256") || "");
  if (received.length !== expected.length || !crypto.timingSafeEqual(received, expected)) {
    return res.sendStatus(401);
  }
  let payload;
  try { payload = JSON.parse(req.body.toString("utf8")); } catch { return res.sendStatus(400); }
  res.sendStatus(200);                      // answer first...
  setImmediate(() => handleEvent(payload)); // ...then process (use a queue in production)
});

function handleEvent(payload) {
  for (const entry of payload.entry ?? []) {
    for (const change of entry.changes ?? []) {
      if (change.field !== "messages") continue;
      for (const msg of change.value.messages ?? []) {
        console.log("message", msg.id, msg.from_user_id, msg.type, msg.text?.body);
      }
      for (const status of change.value.statuses ?? []) {
        console.log("status", status.id, status.status);
      }
    }
  }
}

app.listen(3000);
The same handler in Python (Flask)
# pip install flask   (saved as webhook.py)
import hashlib
import hmac
import os
import threading

from flask import Flask, abort, request

app = Flask(__name__)
VERIFY_TOKEN = os.environ["VERIFY_TOKEN"]
APP_SECRET = os.environ["APP_SECRET"].encode()


@app.get("/webhook")
def verify():
    if (request.args.get("hub.mode") == "subscribe"
            and request.args.get("hub.verify_token") == VERIFY_TOKEN):
        return request.args.get("hub.challenge", ""), 200
    abort(403)


@app.post("/webhook")
def receive():
    raw = request.get_data()  # raw bytes, before any JSON parsing
    expected = "sha256=" + hmac.new(APP_SECRET, raw, hashlib.sha256).hexdigest()
    received = request.headers.get("X-Hub-Signature-256", "")
    if not hmac.compare_digest(expected.encode(), received.encode()):
        abort(401)
    payload = request.get_json(silent=True) or {}
    threading.Thread(target=handle_event, args=(payload,)).start()  # use a queue in production
    return "", 200


def handle_event(payload):
    for entry in payload.get("entry", []):
        for change in entry.get("changes", []):
            if change.get("field") != "messages":
                continue
            for msg in change["value"].get("messages", []):
                print("message", msg["id"], msg.get("from_user_id"), msg["type"])
            for status in change["value"].get("statuses", []):
                print("status", status["id"], status["status"])
To test locally, expose the port over HTTPS with a tunnelling tool, use that URL as the Callback URL, then send yourself a message. Replying to it is covered in how to send messages with the WhatsApp API, and the app setup in our Cloud API setup guide.
How Wabot handles webhooks
When your number is connected to Wabot, Meta’s webhooks for it go to Wabot. Incoming messages land in the shared inbox, statuses update each message, and your workflows run, so you don’t host the endpoint above. If you build on the Cloud API through Wabot, three tools pass events on to your own systems.
1. Outgoing webhooks. In Settings → Developer → Webhook, click Add webhook, enter the Webhook URL and pick the Events:
| Event | Wabot sends | Example body |
|---|---|---|
| WhatsApp message | A customer messaged you; you choose the message types (Text message, Image, Order and more) | {"messageId": "wamid.HBgL…", "status": "received"} |
| Template status updated | Meta approved, rejected or paused a template | {"template_id": "1234567890123456", "status": "APPROVED"} |
| Data view | A workflow run finished | {"masterWorkflowId": 42, "status": "Success"} |
| Campaign completed | A campaign update, signed with X-Signature | {"msg": "Campaign completed", "responseData": {…}} |
Payloads are small: use the IDs to fetch details through the API. Campaign completed requests carry an X-Signature header, a hex HMAC-SHA256 computed with your Client Secret over the JSON-encoded msg value, as the Wabot docs show:
import crypto from "node:crypto";

// Wabot "Campaign completed": X-Signature = hex HMAC-SHA256 of JSON.stringify(body.msg), keyed with your Client Secret
function isFromWabot(body, signature = "") {
  const expected = Buffer.from(crypto.createHmac("sha256", process.env.WABOT_CLIENT_SECRET)
    .update(JSON.stringify(body.msg))
    .digest("hex"));
  const received = Buffer.from(signature);
  return received.length === expected.length && crypto.timingSafeEqual(received, expected);
}
The other events aren’t signed, so use a hard-to-guess URL path and HTTPS. Wabot sends each event once, so answer quickly and reconcile critical data through the API from time to time.
2. Status for one message. Add callback_url and event (sent, delivered, read, failed, replied) when you send a message through Wabot’s API, and Wabot posts updates for that message, such as {"status": "delivered", "senderPhoneNumber": "+15551234567"} (delivery callbacks).
3. Start a workflow from your system. Build a workflow whose trigger is Webhook is called and save it to generate its Webhook URL. POST any JSON to it:
curl -X POST "https://wh.wabot.shop/webhook/workflow/<WORKFLOW_IDENTIFIER>" \
  -H "Content-Type: application/json" \
  -d '{"phone": "+15551234567", "name": "Maya", "order_id": "1042"}'
Map the body’s fields under Variables, set the actions’ Phone number variable to the field with the number, and Wabot finds or creates that contact and runs the actions, for example Send a template with the order number. Treat the URL like a password (Wabot docs). AI tools can also read replies and send messages through the Wabot MCP server.
Get WhatsApp events in your own system
Create your free Wabot account and connect your WhatsApp number. Webhooks and API credentials are under Settings → Developer. No card needed.
Frequently asked questions
Why won’t Meta verify my webhook URL?
The usual causes: the verify token in the App Dashboard doesn’t match the one on your server, the endpoint returns JSON or a status other than 200 instead of the plain hub.challenge value, or the server’s TLS certificate is self-signed or invalid.
Does Meta resend WhatsApp webhooks that fail?
Yes. If your endpoint answers with anything other than 200, or can’t be reached, Meta tries again with decreasing frequency for up to 7 days. That can produce duplicates, so make your handler idempotent, for example by keying on the message ID and status.
How do I get the delivery status of a message I sent?
Subscribe to the messages field. Status webhooks (sent, delivered, read, failed) carry the same wamid the send request returned. Failed statuses include an errors array with the error code.
Do I need my own webhook if I use Wabot?
No. Meta’s webhooks for your number go to Wabot, which shows messages in the inbox and runs your workflows. Add a Wabot webhook only if another system of yours needs the events.
Can I send webhooks for different numbers to different URLs?
Meta lets you set an alternate callback URL for certain webhook fields per Messaging account (the WABA) or per business phone number. In Wabot you can add more than one webhook and pick the events for each.
The short version
A WhatsApp webhook needs a GET that echoes hub.challenge when the verify token matches, a subscription to the messages field, and a POST handler that checks X-Hub-Signature-256 on the raw body, answers 200 at once and processes from a queue without trusting order or uniqueness.
Build it once and every reply, delivery and failure reaches your system. On Wabot, Meta’s side is handled for you, and outgoing webhooks, callback_url and the Webhook is called trigger connect it to the rest of your stack. More error codes: WhatsApp API error codes explained.