

1. Go to the Business Manager’s Security Center. Click Start verification

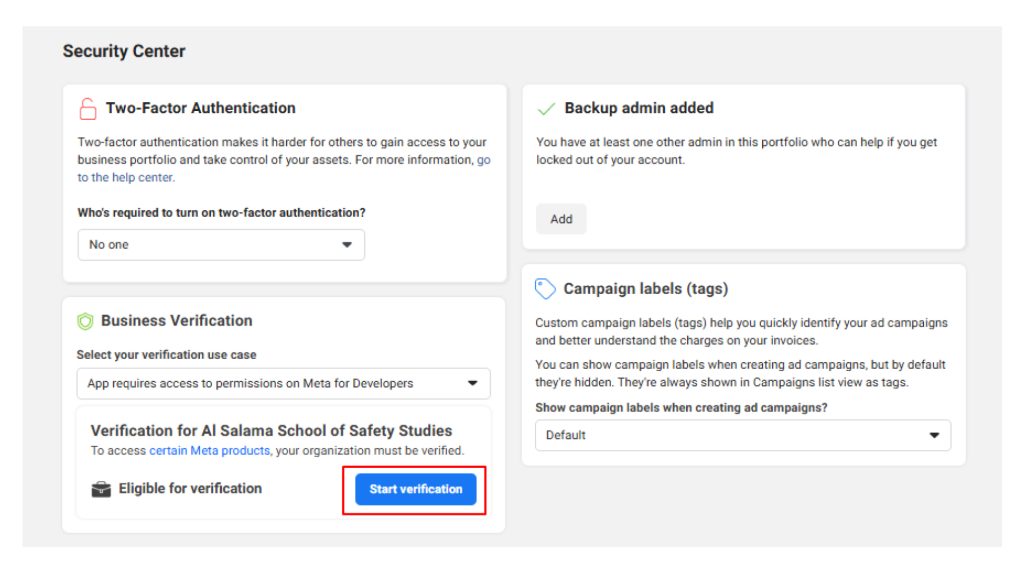
Note: You may have received a notification to begin verification in another platform, such as Meta Ads Manager, Commerce Manager and the App Developer Dashboard.
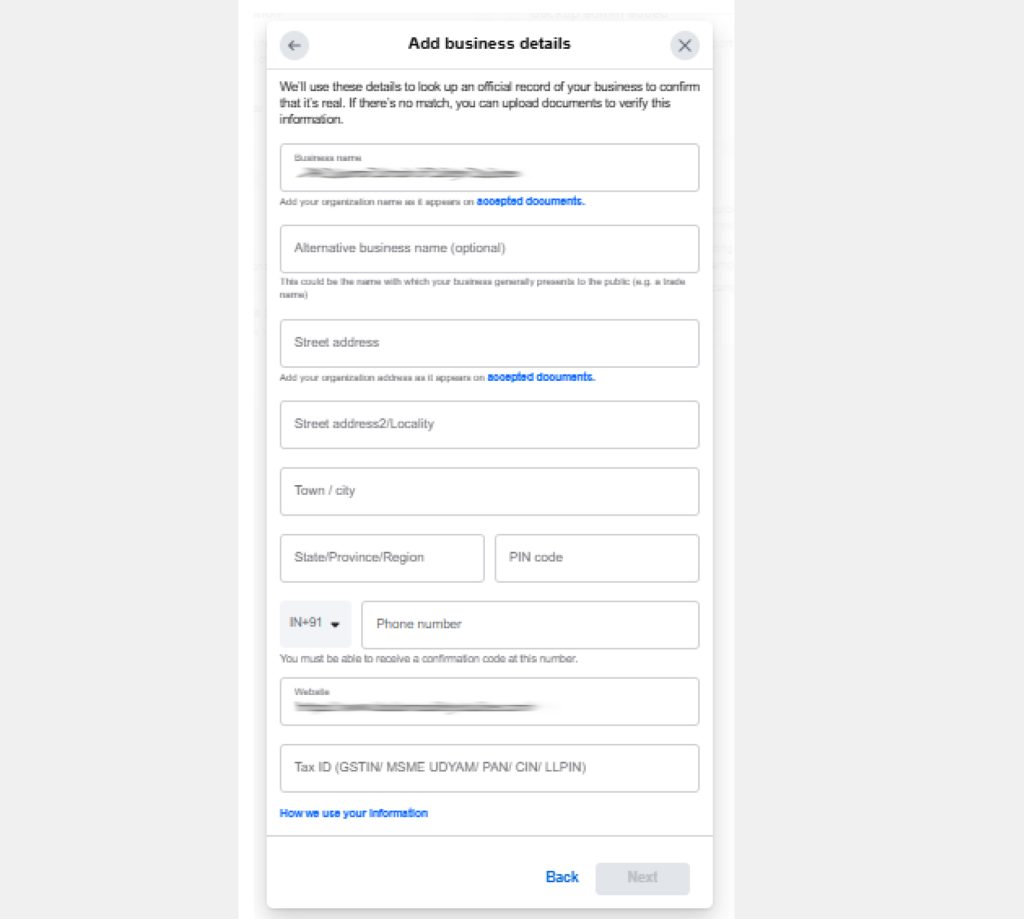
2.Provide your business’s details, including the legal business name, address, phone number and website.

Note: Make sure the details you submit exactly match the details of your legal business entity. Also make sure your business’s website loads and is HTTPS compliant.
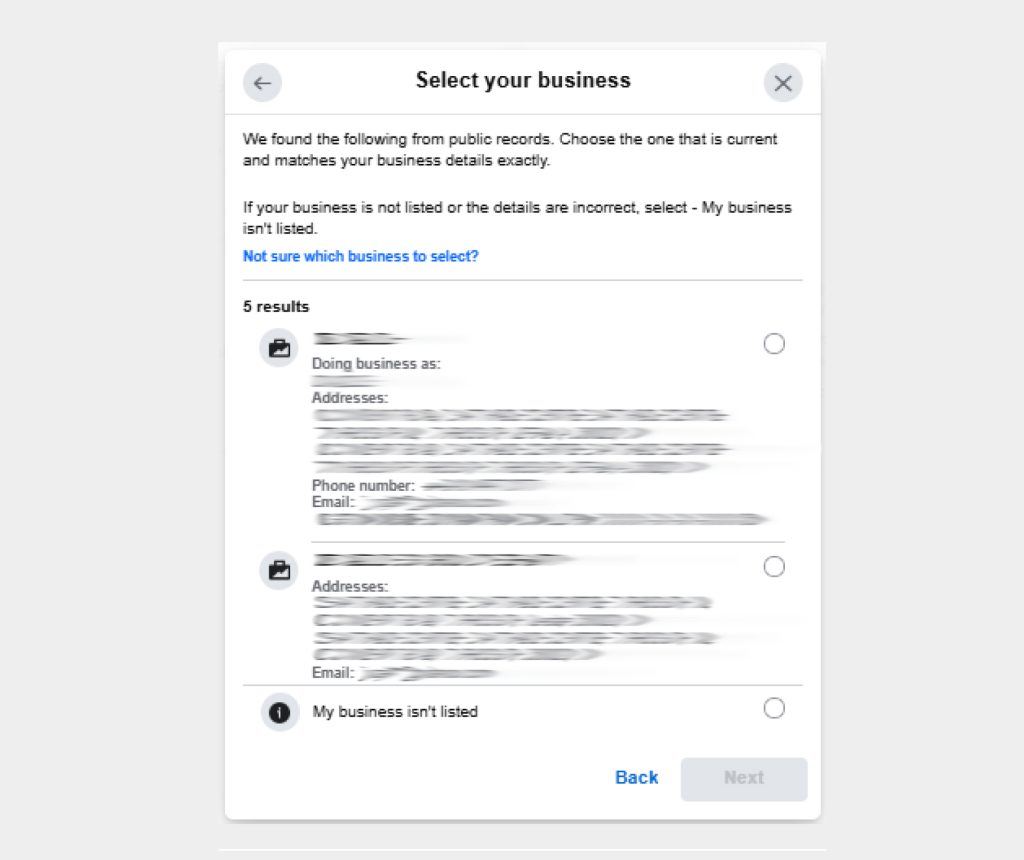
3.Confirm your business’s details.
If no matching record is found, upload supporting documents, such as a business license or articles of incorporation, to confirm the details you entered.
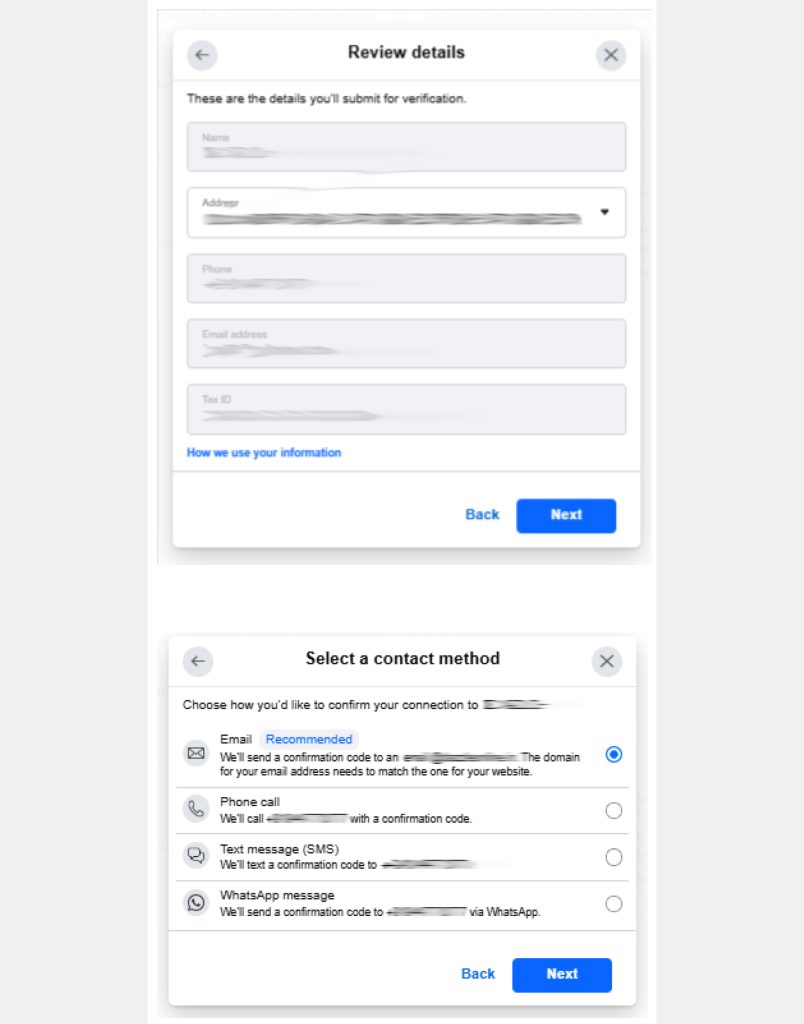
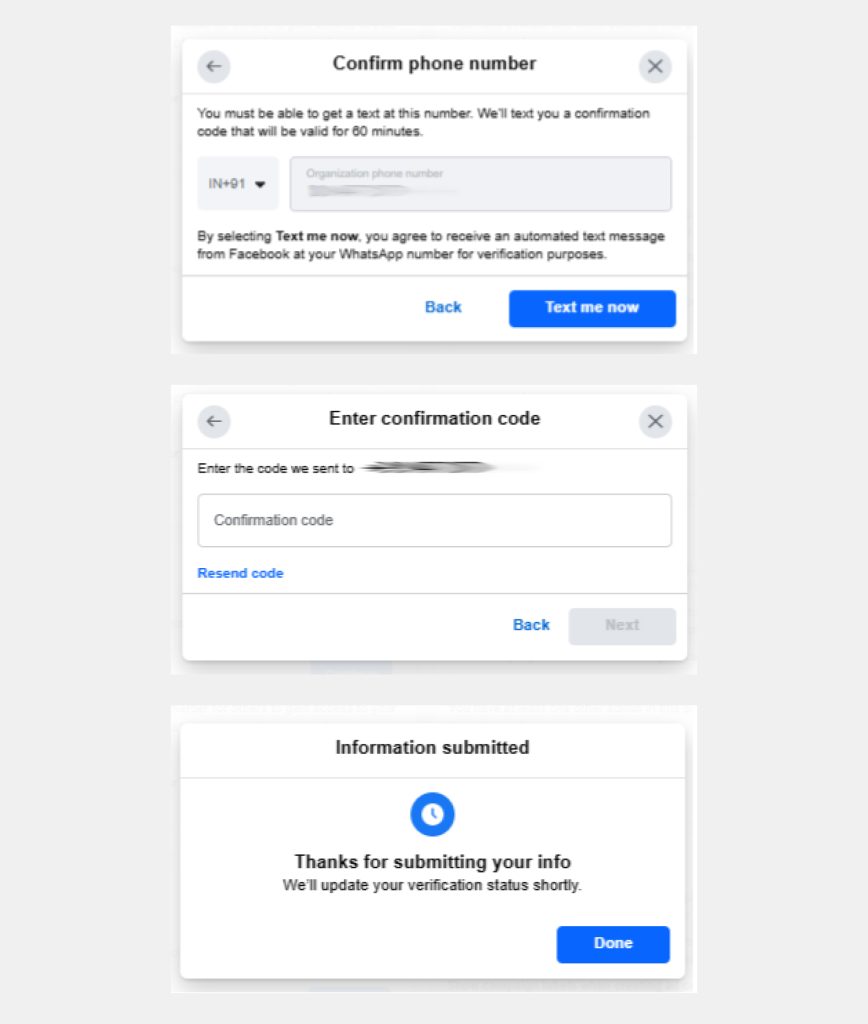
4.Choose a method to confirm your connection.
A confirmation code will be sent if you choose email, phone, text message or WhatsApp. To confirm via domain verification, follow these steps.
- Email (The domain of your business email address must match the domain of your website.)
- Phone
- Text message
- WhatsApp message
- Domain verification (You must have admin access to your site’s web host or DNS provider.)
Select one of the following options to verify your domain:
Add a meta-tag to your HTML source code
- Copy the meta-tag you see on your Business settings screen.
- Open your website’s home page HTML source.
- Paste the meta-tag into the <head>….</head> section of the HTML code, and publish the page.
- Go to the root domain of your website, and view the HTML source to confirm that the meta-tag is there.
Upload an HTML file to your root directory
- Download the HTML verification file that’s linked on your Business settings screen. Remember, don’t make any changes to the file after you download it.
- Upload the HTML file to the root directory of your domain.
- Go back to Business settings, and click on the link in step 3 to confirm that you can see the verification code on your website.
Update the DNS TXT record with your domain registrar
- Go to your domain registrar and log in.
- Go to the DNS records section.
- Go back to your Business settings screen and copy the TXT record in step 2.
- Add the TXT record in your DNS configuration by following the instructions from your domain registrar.
- Use a DNS TXT lookup tool to confirm the TXT record has been updated across your servers.


